Spook-tacular Memories: How to Set Up the Perfect Halloween Photo Booth


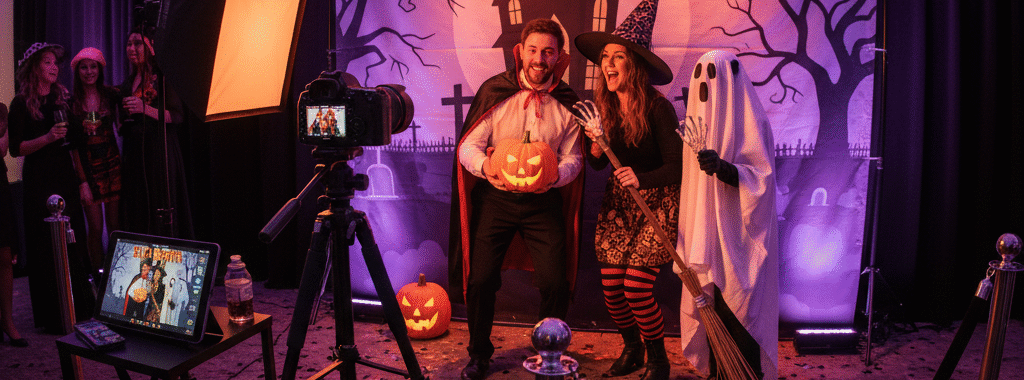
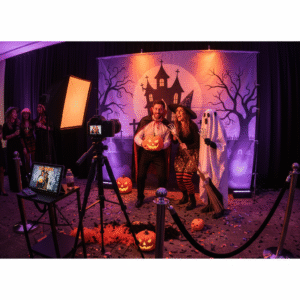
Halloween is just around the corner, and whether you’re hosting a costume party, organizing a community event, or just want to capture some frighteningly fun family moments, a photo booth is the perfect way to preserve those spook-tacular memories. With a little creativity and the right setup, you can create an interactive experience that your guests will be dying to share on social media.

Why Halloween and Photo Booths Are a Match Made in… Well, Not Heaven

Halloween is all about transformation and self-expression – and what better way to capture those amazing costumes and creative makeup looks than with a dedicated photo space? A Halloween photo booth encourages guests to ham it up, try different poses, and create lasting memories of their ghoulish personas.

Plus, let’s be honest: people love sharing their Halloween looks online. A well-designed photo booth gives them the perfect backdrop and lighting to showcase their costumes in the best possible way.

Essential Elements for Your Halloween Photo Booth Setup

Choose Your Haunted Location

Pick a spot with good natural light if possible, or be prepared to add your own lighting setup. A corner of your living room, garage, or even outdoor space can work perfectly. Make sure there’s enough room for groups to gather and strike poses without feeling cramped.

Create a Spine-Chilling Backdrop

Your backdrop sets the entire mood. Here are some winning ideas:

  • Classic spooky: Black fabric with hanging plastic spiders, bats, or skeleton hands
  • Haunted mansion: Dark curtains with vintage picture frames and candelabras
  • Graveyard scene: Gray backdrop with foam tombstones and skeleton decorations
  • Pumpkin patch: Orange and brown fabrics with real or artificial pumpkins
  • Gothic elegance: Deep purple or burgundy with ornate mirrors and ravens

Perfect Your Lighting

Good lighting can make or break your photos. Avoid harsh overhead lighting that creates unflattering shadows. Instead, try:

  • String lights for a warm, magical glow
  • Colored LED lights (purple, orange, green) for an eerie effect
  • Ring lights or softbox lighting for professional-quality photos
  • Candles or lanterns for authentic spooky ambiance (battery-operated for safety)

Stock Up on Props

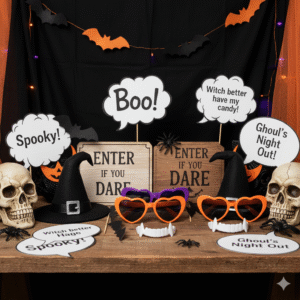
Props are what transform a simple photo into a memorable experience. Gather items like:

  • Vintage picture frames (remove the glass for safety)
  • Witch hats, vampire fangs, and costume accessories
  • Signs with Halloween phrases like “Boo!” or “Enter if you dare”
  • Fake weapons (plastic swords, rubber knives)
  • Skull decorations and skeleton hands
  • Magic wands and crystal balls
  • Halloween-themed speech bubbles with phrases

Technical Tips for Picture-Perfect Results

Camera Setup

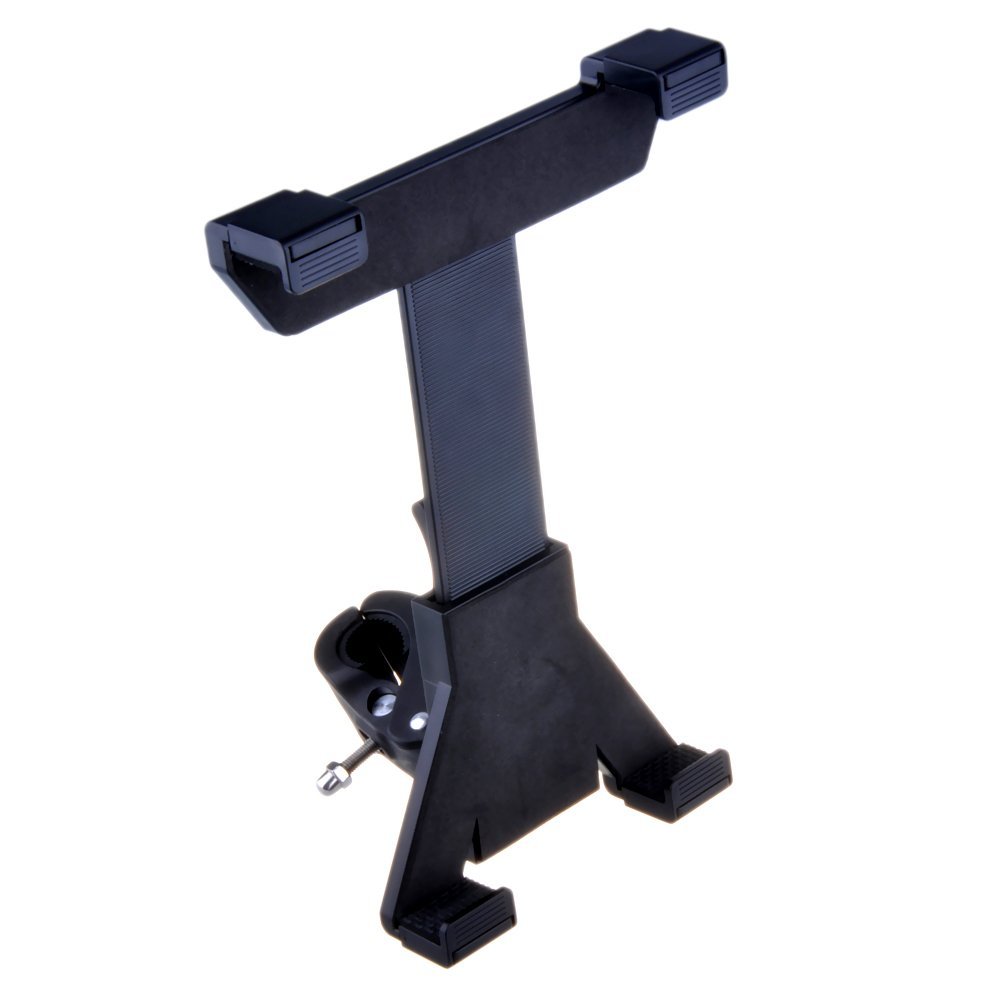
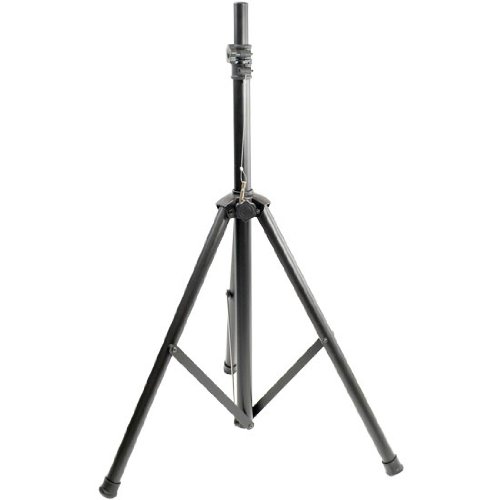
Whether you’re using a smartphone, tablet, or professional camera, stability is key. Use a tripod to ensure consistent framing and sharp images. Set your camera at chest height for the most flattering angles.

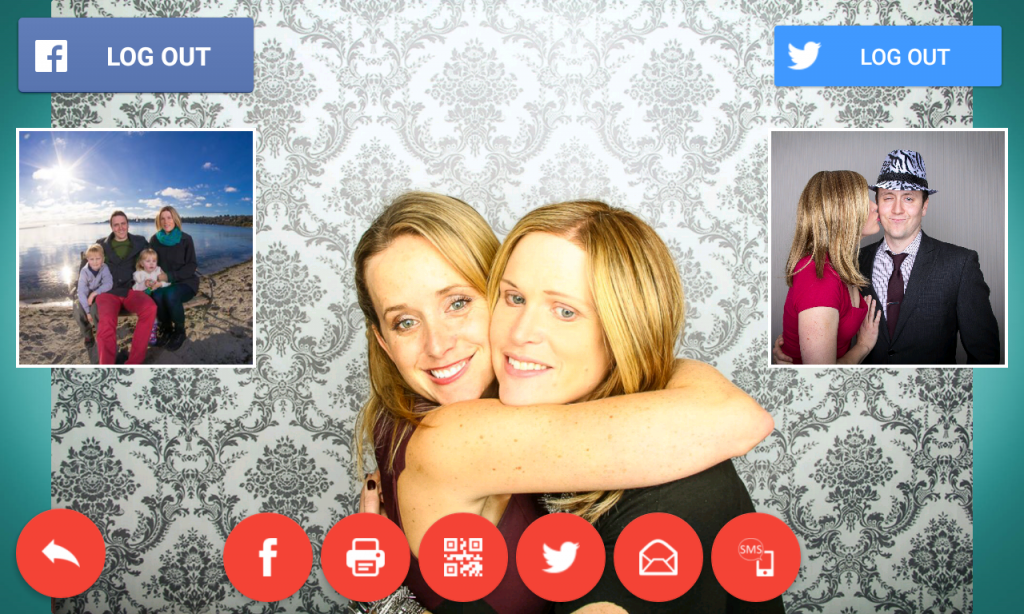
Photo Booth App Features to Leverage

Modern photo booth apps offer incredible features that can elevate your Halloween setup:

  • Custom filters and frames: Add Halloween-themed borders, spooky effects, or seasonal graphics
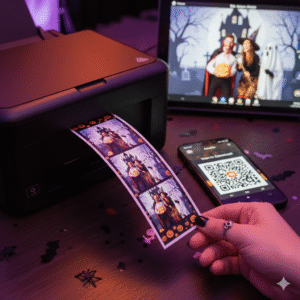
  • Instant sharing: Let guests immediately post their photos to social media
  • Digital props: Overlay virtual Halloween elements like floating ghosts or flying bats
  • Green screen effects: Transport your guests to haunted houses, graveyards, or pumpkin patches
  • Multiple photo layouts: Offer strip formats, collages, or single shots
  • Branding options: Add your party details or event logo to each photo

Timing and Flow

Keep the energy high by managing the photo booth efficiently. Consider having someone act as a “booth attendant” to help with props and encourage creative poses. This keeps the line moving and ensures everyone gets great shots.

Creative Pose Ideas to Share with Your Guests

Help your guests break out of the standard “smile and wave” routine with these Halloween-specific pose suggestions:

  • The classic monster pose: Arms outstretched like Frankenstein’s monster
  • Vampire drama: Hand over face with one eye peering through fingers
  • Witch’s spell: Pointing a wand or finger with an exaggerated expression
  • Zombie shuffle: Stumbling poses with arms reaching forward
  • Group scream: Everyone with mouths open in mock terror
  • Back-to-back: Perfect for showing off costume details

Making It Social Media Ready

Today’s party guests expect their photos to be instantly shareable. Make sure your setup produces social media-worthy content by:

  • Ensuring good image quality and resolution
  • Using hashtags related to your event or Halloween
  • Creating a unique event hashtag for guests to use
  • Encouraging guests to tag your social media accounts
  • Offering both horizontal and vertical photo options for different platforms

Safety Considerations

While creating a spooky atmosphere, don’t forget about safety:

  • Secure all decorations properly to prevent tripping hazards
  • Use battery-operated candles instead of real flames
  • Ensure props are safe and won’t cause injury
  • Keep walkways well-lit and clear of obstacles
  • Have someone monitor the area if serving alcohol at adult parties

The Magic is in the Details

The difference between a good photo booth and a great one often lies in the small touches. Consider adding:

  • A guest book where people can paste a copy of their photo and write a message
  • Halloween-themed music playing in the background
  • Themed snacks and drinks nearby
  • A “best costume” voting station
  • Take-home photo strips as party favors

Wrapping Up Your Spook-tacular Setup

A well-executed Halloween photo booth becomes the centerpiece of your celebration, giving guests a creative outlet and you a collection of amazing memories. The key is balancing spooky atmosphere with practical functionality – creating something that looks incredible but is also easy for guests to use and enjoy.

Remember, the best photo booth is one where people feel comfortable being silly, creative, and authentically themselves (or their Halloween personas). With the right combination of atmosphere, props, technology, and encouragement, your Halloween photo booth will be the talk of the neighborhood long after the last ghost has gone home.

Ready to start planning your Halloween photo booth? The only thing left to do is gather your supplies, test your setup, and prepare for a night of frighteningly fun photos that your guests will treasure forever.


Social Sharing Station

SLR-BOOTH-SOCIAL_icon_512px

The SLR Booth social sharing station allows your guests to share photos from your photo booth on a second screen, freeing up the booth for more photo taking fun!

Link to Play Store


Automatically searches for, and connects to an SLR Booth Pro app running on the same network.

Supports the same great sharing functions as the SLR Booth Pro app:

  • Email
  • Print
  • SMS
  • QR Code
  • Facebook
  • Twitter

screenshot-2016-05-24_21.17.00.714

Triggering Options

SLR Booth provides a number of options for triggering the countdown, allowing for flexibility and creativity when it comes to creating your photo booth setup.

Touch

If you’re using a tablet or all-in-one with a touchscreen, then using the touch is probably the way to go. Just press the button with the camera icon on the screen, and the countdown will start.


Keyboard

SLR Booth will also respond to the space key being pressed. This can be sent from a standard USB or bluetooth keyboard, but another great option is to use a USB foot pedal programmed to send the space key.


Bluetooth Remote

There are several bluetooth camera remotes on the market that operate by sending the volume up key – SLR Booth will function just fine with these to start the countdown.


SLR Booth Remote App

If you have an extra Android phone, you can install the SLR Booth Remote app, and it can function as a basic UI with a few more features than a simple button – it can trigger and cancel the countdown, and also supports approving/deleting images after they’re taken. This works great when running the main app on an HDTV & Android TV box – users get a big screen to look at, but can still use a touch interface.

Advanced templates with overlays

SLR Booth makes it easy to import your own custom templates – all you need is a PNG file with transparent areas for the photo placeholders, and SLR Booth will automatically detect the placeholders for you.
This works great if your placeholders are simple rectangles, but what if you’d like something a bit fancier? Or perhaps some text overlaid on top of the image?
In this case, you’ll need to put a bit more work into your template, but the process is still fairly simple.
Start by creating your template as you want it to look in it’s final state, complete with separate layers for any overlays over top of the transparent areas. For our example, we’ll use GIMP as our editing tool, and create a basic 4-placeholder template with an overlay in the middle.

Our image has 5 layers:

Layers

The bottom layer is our background – in this case a damask pattern:

Background

The next layers are for some frames and drop shadows:

Frames

Next we have some rectangles for our placeholders in a contrasting color:

Placeholders

And finally, our overlay:

Overlay

Start by selecting the red areas of our placeholders:

Placeholders_Selected

Then, switch to the background layer and delete:

Background_Cutout

Next, switch to the overlay layer, and set the opacity to 99 percent:

99

Then hide the placeholders layer, and show all other layers. Now we have our finalized template:

Complete
Finally, export your template as a PNG file, and load into the SLR Booth app as usual. The overlay portion will be on top of the photos, but the photo placeholders will be detected appropriately by the app.

SLR Booth Remote

The first companion app to SLR Booth Pro is now available: SLR Booth Remote.


SLR-BOOTH_REMOTE_icon_512pxPlay2


SLR Booth Remote allows you to trigger the countdown over wifi from another android device. Now you can run SLR Booth Pro on a TV-Box hooked up to an HDTV, and still trigger it from a handheld touchscreen device.

Best Photo Booth Lens

There are dozens of lens options available to a Nikon or Canon photographer, so it helps to narrow down the options to find the best photo booth lens in your price range.

The general guidelines are:

  • Primes are preferred to zooms. Primes generally give better image quality at a given price, and the flexibility of a zoom isn’t required as you are in control of camera and subject placement.
  • Focal length should be on the wide side (18-35mm on a crop sensor, 28 – 50mm on a full frame camera)
  • IS and fast apertures aren’t required, as you’ll typically be shooting between at middle apertures (between f/5.6 and f/11) and using a tripod.
  • Lower price is better, as parties and events can be a harsh environment for expensive gear.

With that in mind, here are a few suggested options

Canon Lenses:

Crop sensor bodies (ie, Rebels, 70D/60D/50D, 7D):

24stm EF-S 24mm 2.8 STM pancake lens. At $149 us it is one of the least expensive canon lenses available, has impressive image quality at middle apertures, and hits the sweet spot for focal length.
18-55 18-55 3.5-5.6 kit lens (IS / IS II / STM). Generally included with a camera body, these lenses aren’t the most impressive optically, but give decent results at middle apertures, so long as your subjects avoid the corners at the wider focal lengths. Can be helped quite a bit by lens correction in post production.

Full frame bodies (ie, 6D, 5D, 1D series):

40stm EF 40mm 2.8 STM pancake lens. Similar to the 24mm crop version, it isn’t overly expensive at about $199 us, gives great image quality at middle apertures, has a good focal length for this application.
50 EF 50mm 1.8. The “nifty fifty” or “plastic fantastic” is literally the cheapest lens you can buy from Canon, but is just as sharp at f/8 as the 20x as expensive F/1.2 version. A little bit on the long side in terms of focal length.

Mounting Options

Before you begin using SLR Booth, you’ll need to setup your equipment. One of the first challenges you’ll face is getting your mobile device and camera physically mounted together. Fortunately, a number of products exist to solve exactly this problem.

Phone:

As phones are small and light, the easiest solution is to mount your phone directly on your camera using a hot shoe adapter. Once your phone is mounted to your camera, you can then put your camera on a tripod, or any other convenient location such as a shelf or table.

mountphone

http://www.amazon.ca/ChargerCity-Adjustable-Smartphone-Motorola-simultaneously/dp/B00C3QF4GY

The downside to this mounting option is that it prevents you from using an on-camera flash

Tablet

Tablets are a bit bigger than phones, but are still light enough to be mounted on a standard tripod. Using a Mic stand tripod mount, you can clamp a tablet mount directly to your tripod, and position it so the lens is close to the screen.

tabletmount

http://www.amazon.ca/Universal-Microphone-Concerts-Wedding-Meetings/dp/B00JFLAVFY/ref=sr_1_3?s=electronics&ie=UTF8&qid=1417559081&sr=1-3&keywords=mic+stand+tablet

Large screen / All-in-one

Large monitors are excellent from a user’s perspective, but much more difficult to mount. A standard photo tripod isn’t sturdy enough to hold up a large LCD monitor, so something a bit beefier is required.

PA speaker stands are designed to support 100+ lbs of gear, and are sturdy enough to hold a monitor, but unfortunately aren’t designed for that job. However, they can be drilled to accept a standard VESA LCD wall mount, which can then be bolted on and secured with nuts. An articulating mount designed for mounting on a single stud is perfect for this use.

allinonemount

http://www.amazon.ca/Mount-It-Panel-Monitor-Articulating-inches/dp/B001DKMO0A/ref=pd_cp_ce_3

pastand

http://www.amazon.ca/PYLE-PRO-PSTND2-Tripod-Speaker-Stand/dp/B000E0PPG0/ref=sr_1_1?s=electronics&ie=UTF8&qid=1417559125&sr=1-1&keywords=pa+speaker+stand

Focus Settings for Photo Booth operation

One of the most important factors in how good a photo looks is the focus. It doesn’t matter how great a subject or the lighting looks in the photo, if the focus is off then the photo isn’t worth keeping.

  • Modern DSLR cameras used with SLR Booth Support at least 3 focus modes:
  • Phase detection auto focus
  • Contrast detection auto focus
    Manual focus

Some new cameras such as the Canon 70D and 7D mk II support a hybrid auto-focus, but we’ll concentrate on these three main types.

Phase detection auto focus is the standard focus system for DSLR cameras. It is very fast, and quite accurate, but only works with the camera’s mirror down. When SLR Booth is running and showing a live-view preview, the mirror is up, so if this method of autofocus is used the camera must drop the mirror to focus, perform auto focus, then raise the mirror to take the picture. This flipping of the mirror up and down adds a bit of shutter lag and noise, but results in fast, accurate focus.

Contrast detection auto focus is used by DSLRs when running in live view mode. It is typically slower than phase detection to lock focus, but it doesn’t need to move the mirror. So while focusing is slower, there is less shutter lag. Some cameras will also do automatic face detection in this focus mode, which can be very helpful for a photo booth.

Manual focus is done by the photographer, rather than the camera. The benefit to manual focus is that there is no shutter lag, and you get consistent focus between shots. The downside is that your subjects have to be in the same place each time for this to work. Luckily, in a photo booth setting, this is actually pretty easy to accomplish. If shooting with a crop-sensor camera with at 24mm, and the apeture set to f/8, set the focus point to 6 feet and then everything between 4 feet and 11 feet will be in focus. Just place a mark on the floor 6 feet from the camera, and have the subjects stand there.

Personally, I only ever find myself using phase detection and manual focus: Manual when using a foot-pedal trigger, and phase-detection otherwise. Just remember to change your shutter delay in the settings when switching between focus modes!

Exposure Settings for Photo Booth Operation

Cameras are designed to make exposures. Every time you hit the shutter button, the camera samples the incoming light, and turns this information into a photo. To get a correct exposure on your photo, the sensor must recieve a certain volume of light.

This “volume” of light is controlled by three factors:

  • The size of the opening (aperture)
  • The length of time for the exposure (shutter speed)
  • The sensitivity of the sensor (ISO)

When your camera is in manual mode, you are in control of all three variables. Switching your camera to any other mode, and it will figure out one or more of the variables for you, based on the built-in light meter. For a photo booth, you should always be in manual mode to get consistent lighting between shots. And if you are using a manual flash, the camera’s meter will be wrong anyways.

Take an example of an outdoor photo on a brightly lit day. The “Sunny 16” rule tells us the correct exposure is:
F/16, 1/100 s, ISO 100

Say we had this exposure, and the photo was too bright. We could darken the photo by one stop by either:
Closing the aperture down to F/22
Speeding up the shutter to 1/200s
Lowering our ISO to 50 (assuming we have a really nice camera where ISO 50 is available)

What if it was too dark? We could do one of the opposite changes:
Open the aperture up to F11
Slowing down the shutter to 1/50s
Increasing our ISO to 200

But, we could even keep the exposure the same, and change some of the variables, so long as we also make the opposite change in one of the other variables:

We could open the aperture up to let more light in, and compensate by having the shutter open for only half the time:
F/11, 1/200 s, ISO 100

Or, we could close the aperture down to let less light in, and compensate by have the shutter open twice as long:
F/22, 1/50 s , ISO 100

All 3 of these exposures are equivalent. In fact, there’s an incredible range of values that would provide the same exposure, all the way up to the physical limits of your camera. So, the question becomes: which settings should one use for a photo booth?

Tradeoffs:
Each of the variables we adjust have tradeoffs that occur when we adjust them:
Aperture
Moves in units called “F-Stops”, which are half-powers of two. Full stop changes are: F/1, F/1.4, F/2.0, F/2.8, F/4.0, F/5.6, F/8, F/11, F/16 …
Aperture controls depth-of-field (DOF). Depth of field describes how far in front and behind the focus point will remain in focus. When we use a very large aperture (say, F/2.0) the depth of field may only be a few inches, but if a very small apeture is used (like F/16) then there may be several feet of depth in focus. While a shallow depth of field can yield a pleasing out of focus background for a portrait of a single subject, for practical purposes a photo booth works best when everyone is in focus, even if they aren’t exactly lined up. Suggestion: Use a aperture around F/8. This gives a good balance between sharpness and depth of field.
Shutter speed
Expressed as time, again moving in “stops” that are either half/twice as long depending on which way you move. Full stop changes are: 1/4000, 1/2000, 1/1000, 1/500, 1/250, 1/125, 1/60, 1/30, 1/15 …
Under natural lighting, shutter speed will control how much motion blur is present in your photos. Speeds of 1/125 to 1/250 will eliminate most blur in stationary subjects, but isn’t fast enough to “freeze” quick motion. Slow the shutter to the 1/30 range and you might start seeing your subjects blurred. Most photo booths will want to use some sort of flash lighting, and this happens incredibly quick (like 1/1000s), so if using a flash, just make sure your camera’s shutter is set to slower than this. Suggestion: Set the flash to the Camera’s maximum flash sync speed, usually between 1/125 and 1/250.
ISO
100, 200, 400, 800, 1600, 3200, 6400…
The sensor sensitivity (ISO) controls how much digital “boosting” is applied to the image. The more boosting applied, the noisier or grainier the image will appear. Suggestion: Choose ISO last after setting aperture and shutter speed. Pick the lowest ISO value that will work with your flash at a reasonable power.

TL;DR version:
For the average photo booth, the following settings should be a decent starting point:

  • Aperture: F/8
  • Shutter: 1/125
  • ISO: 320
  • Flash: 1/4 power

If the photos are too bright, reduce flash and/or ISO.

If the photos are too dark, increase flash and/or ISO.

SLR Booth Supported Cameras

SLR Booth for iOS is designed to work with Canon and Nikon DSLR cameras which support wifi connections. Cameras which support wifi include:

Canon:

  • Rebel T6s, T6i
  • 80D, 70D
  • 6D
  • Models which support the W-E1 wifi adapter

Nikon:

  • D750
  • D7200
  • D5500, D5300
  • Models which support the WU-1a wifi adapter

SLR Booth for Android is designed to work with just about any modern Canon or Nikon DSLR which supports tethered Live-View.

Canon:

  • Sl1
  • T6, T5, T3
  • T6s, T6i, T5i, T4i, T3i, T2i, T1i
  • XSi, XS
  • 80D, 70D, 60D, 50D, 40D
  • 7D Mark II, 7D
  • 6D
  • 5D Mark III, 5D Mark II
  • 1DX,
  • 1Ds Mark III, 1Ds Mark II
  • 1D Mark IV, 1D Mark III, 1D Mark II

Nikon:

  • D4S D4 D3X D3S
  • Df
  • D810 D800/D800E
  • D750 D700
  • D610 D600
  • D300S, D300
  • D7200 D7100 D7000
  • D90 D80
  • D5500 D5300 D5200 D5100 D5000
  • D3500 D3300 D3200

It has been directly tested with the following Cameras:

  • Canon 60D
  • Canon 80D
  • Canon Rebel XSi
  • Canon Rebel XS
  • Canon 6D
  • Canon Rebel T6s
  • Nikon D5000
  • Nikon D3200

The following cameras do not support tethered Live-View, and thus do not work with SLR Booth:

  • Early Nikon D3000 series (D3000, D3100)